
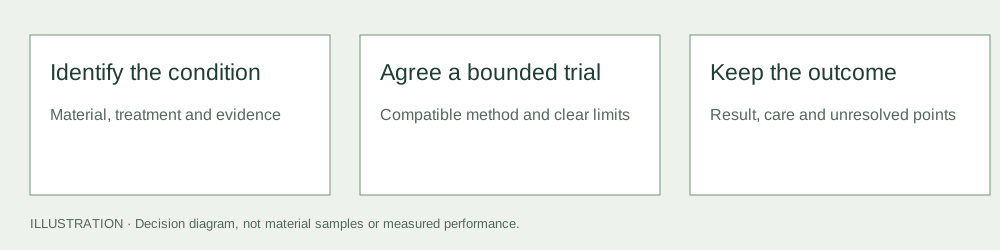
Before sealing a granite countertop seam, identify what kind of joint it is and what problem needs to be solved. A bonded seam between stone pieces, a flexible joint at another material and an impregnator applied to the stone are different systems. Adding a clear product to every line is not a dependable maintenance method.
Photograph the joint dry, note whether it has opened or changed level, and identify the original adhesive or sealant if possible. Ask the fabricator to assess movement, support or failed bonding before treating a visible gap as a cleaning issue.
Identify the joint and its purpose
A fabricated stone seam is coordinated with the slab layout and installation. A connection or movement joint may need a different material and ability to accommodate movement. The slab-layout and seam approval guide addresses the decisions made before cutting; this page concerns identifying and maintaining an installed joint.
AKEMI’s Stone Silicone reference describes a specific product for connecting and movement joints on compatible stone. Its professional epoxy reference describes a different bonding/filling application. Neither description makes those products interchangeable or approves either for your existing seam.
Separate visible symptoms from repair decisions
| Symptom | First question | Next action |
|---|---|---|
| Residue on the surface | Is it a deposit or a treatment film? | Use compatible cleaning after identifying the surface |
| Missing or deteriorated flexible sealant | What joint system and products were specified? | Ask for compatible preparation and replacement instructions |
| Open stone-to-stone seam | Has bonding, support or alignment changed? | Obtain a fabricator’s assessment before filling |
| A ridge or change of level | Is the assembly moving or incorrectly supported? | Resolve the cause; do not conceal it with a coating |
| Dark margins | Could a product, moisture or another cause be involved? | Record history and seek identification rather than adding more product |
A photo cannot settle a concealed support problem. Keep repairs separate from acceptance of the underlying installation, especially on recently completed work where the responsible contractor needs to see the evidence.
Ask for compatibility with the stone and the joint
Obtain the exact product name, technical instructions, intended use, colour and cure or return-to-service conditions from the responsible contractor or manufacturer. Identify any existing treatments and whether old material needs removal under a competent method.
Do not borrow a manufacturer’s instruction for one joint and apply it to another. A product that adheres well may still be inappropriate for the joint movement or may change the appearance of the adjacent stone. Confirm that the proposed method addresses both the joint’s function and its visible finish.
For natural stone treatment, read sealing. Impregnating the stone does not replace a failed joint, restore structural support or close an opening in a bonded seam.
What the owner can record before an inspection
Note the location, approximate extent as observed safely, when it first appeared, whether it changes with use or moisture, and any previous cleaning or repairs. Take an overall photo that shows the joint’s position and detail photos in normal and side lighting. Do not pull pieces apart, cut into the joint or deliberately apply a load to test it.
Keep the original installation documents and care instructions available. The general repair guide helps frame the discussion, while the damage decision file can organise the evidence if a contractual acceptance decision is needed.
Approve repair and care as separate handovers
Have the contractor explain the cause it has identified, the proposed intervention, any appearance limitations, and what would require further work. Where a cosmetic match matters, agree a sample or trial before extensive work. Follow the actual product’s curing and cleaning instructions instead of a universal waiting time from a general guide.
After completion, keep the product and joint identification, scope, care instructions and any remaining limitations together. Use compatible cleaning and avoid repeated chemical or abrasive trials around an unidentified joint. This article has not inspected the countertop, identified its adhesive or approved a particular repair.
Questions & discussion
Share a question or a useful experience about this guide. Comments appear immediately. Your name and comment are public. Email is optional and stays private; reply emails are not enabled yet. Comment privacy.