
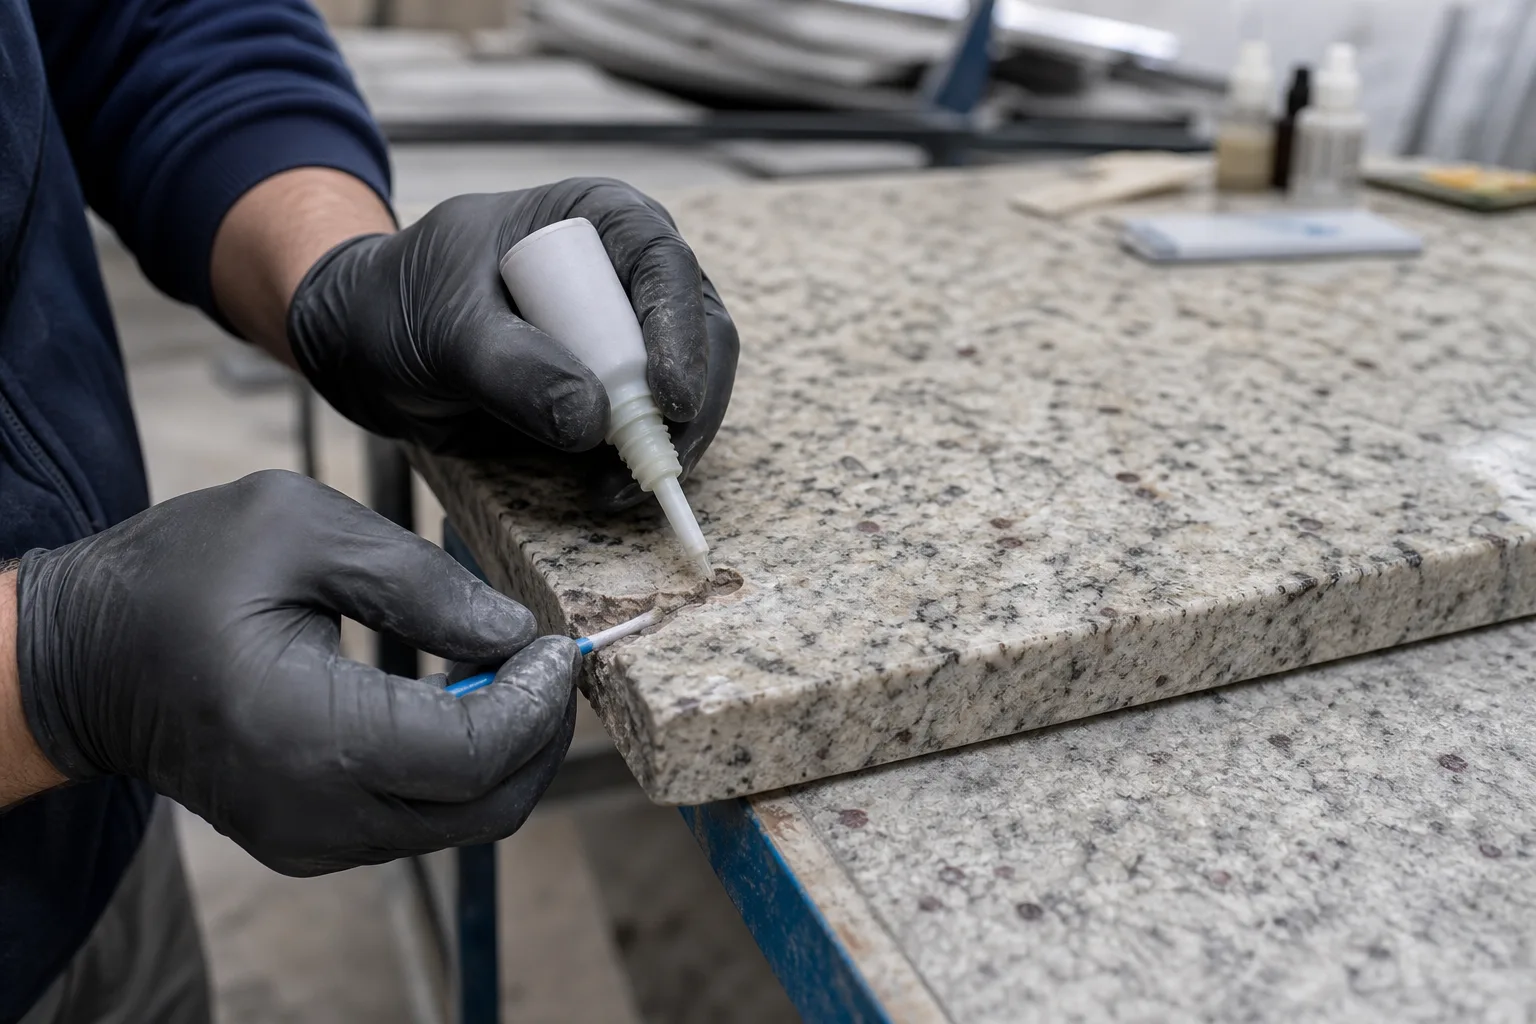
To repair chipped granite, first confirm that the damage is a small, stable chip rather than a spreading crack or a structurally important break. Clean and dry the area, retain any detached fragment, test a stone-grade epoxy or polyester repair resin in an inconspicuous place, mask the surrounding surface, fill or bond the chip, allow the product to cure fully, and level the repair without cutting or over-polishing the adjacent stone. A do-it-yourself repair may be reasonable for a shallow cosmetic chip, but movement, deep cracking, a damaged sink rail, an unsupported edge or safety-critical paving, stairs and cladding should be assessed by a qualified stone fabricator or relevant construction professional.
Identify the Stone and the Type of Damage
Geological granite and commercial granite are not identical categories
In geology, granite is generally understood as a coarse-grained intrusive igneous rock containing substantial feldspar and quartz. In the dimension-stone trade, the granite group is broader and may include gneiss, granodiorite, gabbro and other crystalline stones with broadly similar fabrication or performance characteristics. The Natural Stone Institute explains this distinction between scientific and commercial definitions.
This matters because two products sold as granite can respond differently to resin, pigment, abrasion and polishing. Do not select a repair method solely from a trade name such as black granite, white granite or a code-style material name. Record the supplier name, trade name, finish, installation location and any available geological or test documentation. If possible, test the repair material on an offcut from the same slab.
Distinguish a chip, fissure and crack
- Chip: Local loss of stone, commonly at an exposed edge, corner, cutout or seam.
- Fissure: A naturally occurring feature following the stone's mineral structure. It may be visible or tactile without indicating recent breakage.
- Crack: A fracture caused or enlarged by stress during fabrication, handling, installation or service. It may cross mineral boundaries and can continue through an edge or the full thickness.
- Spall: A flake or layer detached from a surface or edge. Repeated spalling may indicate impact, moisture, anchorage or substrate problems rather than an isolated defect.
The Natural Stone Institute's homeowner countertop guide notes that larger chips may be repaired with epoxy or polyester resin when the completed area is consistent with the surrounding stone in color and texture. The same source distinguishes natural fissures from mechanically induced cracks. Cosmetic filling should not be used to conceal continuing movement or an unresolved support problem.
Decide Whether the Chip Is Suitable for Local Repair
Use the following screening table before purchasing a repair kit or modifying the stone.
| Observed condition | Likely action | Reason |
|---|---|---|
| Small, shallow chip with no movement or connected crack | Consider a local resin fill | The repair is primarily cosmetic and can usually be contained. |
| Detached piece fits cleanly and remains intact | Retain it for possible rebonding | The original fragment may provide a closer mineral and color match than a filled reconstruction. |
| Crack extends from the chip, sink cutout or seam | Request professional assessment | Support, cutout geometry or installation stress may need correction. |
| Stone moves when lightly pressed | Stop using the area and investigate support | Resin alone will not correct substrate or anchorage movement. |
| Chip affects a stair nosing, façade panel, paving edge or anchored component | Use a qualified contractor or engineer as appropriate | Falling material, trip hazards and load transfer make acceptance more than a cosmetic issue. |
| Several pieces are missing or the edge profile must be rebuilt | Professional shop or site repair | Forming, reinforcement, profiling and finish blending may require specialist equipment. |
For exterior dimension stone, ASTM C1722-23 provides guidance on repair and restoration and emphasizes testing proposed methods on sample stone or an inconspicuous area before full-scale work. It also states that product manufacturers' directions should not be overridden. Although the standard's stated scope is façade restoration, these test-first and compatibility principles are useful limitations for other stone repairs. See ASTM C1722-23.
Materials and Step-by-Step Repair Method
Prepare suitable materials
- Stone-grade epoxy or polyester repair system selected for the installation conditions
- Manufacturer-approved pigments or clean matching aggregate, if needed
- Stone-safe cleaner and clean, lint-free cloths
- Painter's tape or another non-staining masking material
- Disposable mixing surface and applicator
- Gloves and eye protection appropriate to the product instructions
- A rigid support, clamp or temporary form when rebonding a retained fragment
Check whether the product is intended for the required exposure, including interior or exterior use, moisture, ultraviolet light and expected temperature. Follow its stated mixing ratio, working time, cure conditions and surface-preparation instructions. Do not assume that a general adhesive, grout, caulk or clear coating is a structural stone repair product.
Repair a small missing chip
- Document the condition. Photograph the chip with a scale and note any connected line, movement or hollow area. This creates a baseline for later inspection.
- Clean the repair area. Remove grease, loose particles and previous coating residue with a cleaner suitable for natural stone. Avoid enlarging the chip. Allow the stone to dry fully.
- Carry out a compatibility test. Test the resin and any pigment on an offcut or concealed location. Review color after cure, not only while the mixture is wet.
- Mask the perimeter. Place tape close to the chip without bridging the void. Protect nearby cabinets, joints and finished surfaces.
- Mix a small batch. Measure and mix according to the manufacturer's instructions. Excess pigment can produce an opaque patch that is more visible than a translucent repair.
- Place the resin. Work it into the chip while avoiding trapped air. Slight overfilling may permit final leveling, but uncontrolled excess increases cleanup and scratch risk.
- Maintain the profile. Use a temporary non-bonding form if the damage is on a vertical edge. Do not allow resin to run into a seam, sink joint or movement joint.
- Allow full cure. Protect the area from water, loading and cleaning for the stated curing period. Cure time varies by product and site conditions; do not substitute a generic timetable.
- Level and blend cautiously. Remove excess using the method approved for the repair system. A blade or abrasive can scratch polished stone, create a glossy spot on honed stone or flatten a textured finish. Stop if matching requires grinding or repolishing beyond the local area.
A published granite chip repair overview from Marble.com similarly describes cleaning, filling with epoxy, curing and leveling. Its product-specific directions should not replace the instructions supplied with the resin selected for the actual stone.
Rebond an intact fragment
Dry-fit the fragment before mixing adhesive. It should return to its original orientation without force. Clean both bonding faces, provide support against sliding, apply only enough compatible adhesive to wet the joint, and align the finished surface and edge profile. Remove squeeze-out by the product-approved method and keep the piece immobilized through cure. A fragment with missing bearing area, multiple cracks or poor fit may need reinforcement or reconstruction by a fabricator.
Match the Repair to the Finish and Application
Finish affects both visibility and the method used to complete a repair. Polished granite reflects light and can reveal a dull resin patch, scratches or an uneven edge. Honed granite requires a consistent matte appearance; spot polishing can create a conspicuous glossy mark. Leathered, bush-hammered and split-face finishes have three-dimensional texture that is difficult to reproduce with a flat fill.
- Polished countertops: Inspect under both direct and raking light for gloss, scratches, resin edges and profile continuity.
- Honed surfaces: Compare the repaired area's color and sheen after it is clean and dry.
- Textured surfaces: Evaluate texture depth as well as color. Specialist tooling may be required.
- Floors and stairs: Confirm that the repair does not create a raised edge, depression or loss of slip-related texture.
- Exterior paving and cladding: Account for moisture, temperature cycles, ultraviolet exposure, joints, anchors and substrate movement.
Granite finishes are fabrication treatments rather than different geological materials. A useful overview of polished, honed, leathered and other finishes is available in the Marble.com granite finishes reference. For project planning, compare the site's finish with the relevant Granite China references for polished granite, bush-hammered granite and split-face granite.
Specifications, Inspection and Acceptance
ASTM C615/C615M covers material characteristics, physical requirements and sampling for granite dimension stone used in building and structural work. Its listed properties include absorption, density, compressive strength, modulus of rupture, abrasion resistance and flexural strength. These source-stone requirements do not establish that a local resin repair restores the original tested performance. Do not apply the slab's laboratory values to a repaired edge or joint without appropriate engineering evidence.
Post-repair inspection checklist
- The resin is fully cured according to the manufacturer's instructions.
- The repaired fragment or fill does not move under normal, non-destructive handling.
- No connected crack has appeared or lengthened.
- The surface is flush where a flush surface is required.
- The edge profile remains continuous and free from a sharp projection.
- Color, translucency, gloss and texture meet the agreed visual sample and viewing conditions.
- No resin contaminates a movement joint, seam, sink joint, anchor or adjacent material.
- The repair has not created new scratches, chips, stains or polish marks.
- Photographs and product details have been added to the inspection record.
Acceptance criteria should be agreed before repair, especially for new supply. Define the permitted viewing distance, illumination, wet or dry condition, sample or mockup, maximum affected area and whether repaired chips are allowed on exposed edges. A statement such as “repair to be invisible” is difficult to inspect consistently because mineral variation and lighting affect visibility.
China Sourcing, Quality Control and Price Factors
China-based marketplaces list granite slabs, tiles and cut-to-size products in many trade names, colors and finishes, including both Chinese and imported stones processed in China. A directory listing is not evidence of quarry origin, geological identity, stock ownership, factory capability, certification or repair quality. StoneContact's China granite tiles and slabs directory illustrates the range of listings but should be treated as a supplier-discovery source rather than independent verification.
For an order involving repaired or resin-treated granite, request written disclosure of filling, mesh backing, reinforcement and repaired edges. Approve representative samples and, for variable stone, review actual slabs or production photographs under defined lighting. The purchase specification should state whether chips may be repaired, where repairs are prohibited, what resin exposure is acceptable, and how color and finish will be judged. Link these requirements to granite quality control, granite defect classification, samples and mockups, sample-versus-slab review and slab layout and seam approval.
Repair cost cannot be inferred from material name alone. Relevant factors include chip dimensions, retained-fragment condition, access, edge profile, finish, color complexity, cure time, need for reinforcement, site protection, travel, dismantling, repolishing and whether the underlying support must be corrected. For imported replacement pieces, matching the original block or slab lot, fabrication setup, minimum order quantity, packing and freight may outweigh the repair material itself. Obtain a scope-based quotation rather than relying on a generic per-chip figure.
Finally, prevention should focus on edge design, handling and support. Protect exposed corners during fabrication, packing and installation; avoid impact from heavy objects; verify cabinet and substrate support; and inspect sink cutouts, seams and narrow rails before acceptance. Sealing may affect liquid absorption and stain management, but it does not reinforce an unsupported edge or prevent impact chipping.
Frequently asked questions
Can a small chip in granite be repaired at home?
A shallow, stable cosmetic chip may be suitable for a carefully tested stone-grade resin fill. Stop and seek professional assessment if the stone moves, a crack extends from the chip, the sink rail or support is affected, or the installation is safety-critical.
Should epoxy or polyester resin be used for chipped granite?
Both are used in stone repair, but suitability depends on the stone, exposure, finish and product formulation. Select a system specifically intended for natural stone and follow its instructions for preparation, mixing, curing and exterior or wet-area limitations.
Will a repaired granite chip be invisible?
Not necessarily. Mineral pattern, translucency, pigment, edge profile, texture, gloss and lighting can reveal the repair. Approve a cured test or mockup and define a realistic viewing distance and illumination for acceptance.
Does sealing granite prevent chips?
No. Sealing is primarily related to liquid absorption and stain management. It does not correct inadequate support or protect an exposed edge from a heavy impact.
When should chipped granite be replaced instead of repaired?
Replacement may be more appropriate when damage is extensive, the stone remains unstable, structural performance is uncertain, multiple fragments are missing, or a repair cannot meet the specified safety, profile or appearance requirements.
Questions & discussion
Share a question or a useful experience about this guide. Comments appear immediately. Your name and comment are public. Email is optional and stays private; reply emails are not enabled yet. Comment privacy.